EV Charger Cable Length & Placement Guide
EV charger cable length and placement guide: 18 vs 25 ft cables, charge port locations, two-car garage strategy, and future-proofing your install in 2026.
11 MIN READ · UPDATED 2026-09-23
Key takeaways
- Measure the cable's real path — around the bumper, not through it — and add three feet of slack before choosing 18 vs. 25 feet.
- Charge port locations vary by manufacturer and side; place the charger for your actual car and parking orientation.
- Central mounting with a 25-foot cable is the best default for current or future two-EV households.
- Run conduit for a second charger during the initial install — it's a few hundred dollars now versus $1,000+ later.
- There's no safe way to extend an EV charging cable; size for the worst-case parking night, not the best.
The most common regret in home EV charging has nothing to do with charging speed or electricity rates. It's the cable that doesn't reach. A charger mounted on the wrong wall, a cable two feet too short, a charge port on the opposite side of the car from where you assumed — these small planning failures turn into daily annoyances that last for years. Cable length and placement decisions are made once, during installation, and they shape every single charging session after. Getting them right costs nothing extra at install time. Getting them wrong costs either a relocation or a decade of irritation.
Why placement matters more than most buyers expect
Charging is a daily ritual, and rituals punish friction. A cable that reaches comfortably means you plug in without thinking — thirty seconds, done. A cable that barely reaches means you park with precision every night, stretch the cable taut across the bumper, or leave the garage door cracked because the geometry doesn't work. Over a year, that friction adds up to hundreds of small annoyances, and annoyance is what makes people skip charging sessions they shouldn't skip.
Placement also drives installation cost. The charger connects to your electrical panel, and every foot of wire run between them costs money — typically $10-$25 per foot for the wire, conduit, and labor once walls need opening. A charger mounted on the panel wall is the cheapest install; one mounted across a finished three-car garage can add $500-$1,500 in wire run costs. Costs are 2026 US market ranges; get itemized local quotes. The tension is obvious: the cheapest mounting spot is rarely the most convenient charging spot, and the art of placement is resolving that tension intelligently.
There's a safety dimension too. Cables stretched taut across walkways become trip hazards. Cables draped over the car to reach a far-side port get pinched in doors and abraded by bodywork. A cable lying across a wet garage floor in winter sits in exactly the puddle you don't want energized equipment resting in. Good placement keeps the cable's path short, elevated on a hook between uses, and clear of foot traffic — boring details that prevent real problems.
Finally, placement decisions interact with everything else in the garage: storage, workbenches, the second car, the path from the car to the house door. The charger should live where it interferes with nothing and serves everything. That means thinking about the garage as a system — where cars park, where people walk, where the panel is — before the electrician drills the first hole.
Charge port locations: the variable nobody warns you about
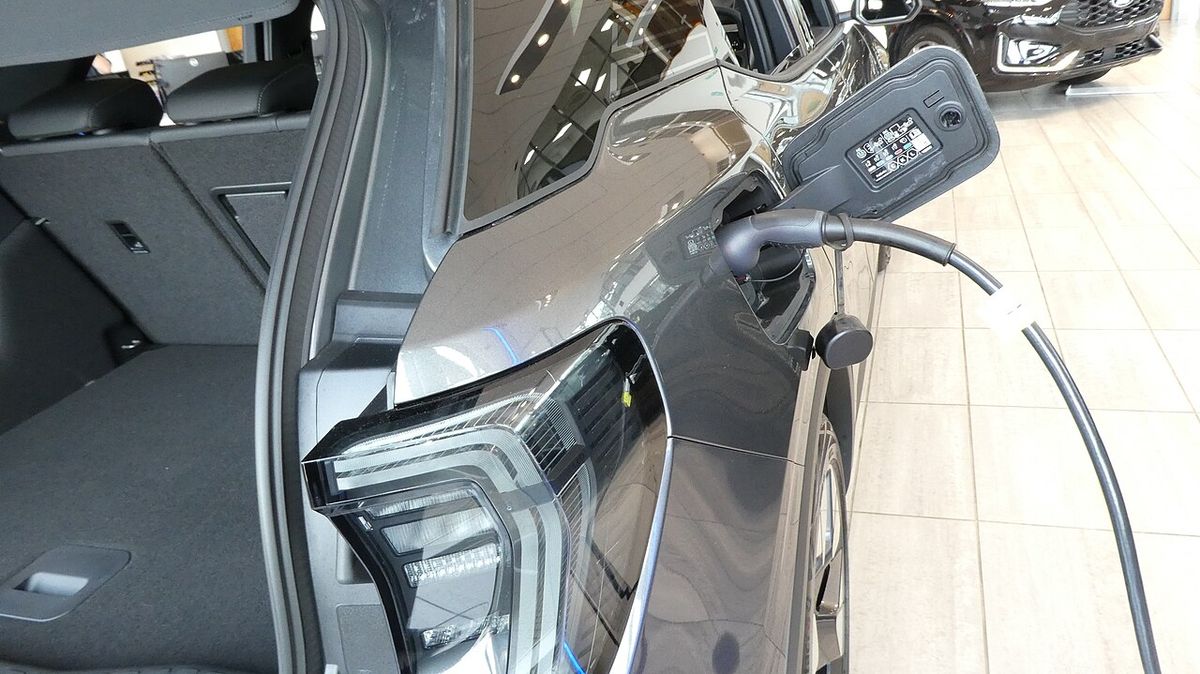
Here's the detail that surprises first-time EV buyers: charge ports are not in a standard location. Different manufacturers put them in different places — front fender, rear fender, front bumper area, rear quarter panel — and on different sides of the car. Some vehicles offer ports on both sides or at both ends. Your charger's placement must account for where your specific car's port is, not where you assume it is.
This matters because the port location determines which wall the charger should mount on and how the cable routes to the car. A car with a rear-mounted port that backs into the garage needs the charger near the back wall or the rear of the side wall; the same car pulled in nose-first needs it near the front. Decide your parking orientation first — nose-in vs. back-in — then place the charger to serve the port in that orientation. Changing your mind later means either re-parking habits or a charger that never quite reaches comfortably.
Households with two EVs face the port-location puzzle squared. Two cars from different manufacturers can have ports on opposite sides and opposite ends, which is why the center of the garage — a shared wall between bays, or a ceiling-mounted retractor — is often the smartest placement for multi-EV homes. If you're buying a second EV in the next few years, check port locations on your shortlist before finalizing charger placement; a few minutes of research now prevents a second installation later.
Don't forget the portable charging cable that came with the car. It's shorter than a wall charger's cable and useful as a planning reference: if the car's own cable can't comfortably reach from a candidate mounting spot, neither will daily charging feel comfortable there. Some owners also keep a mobile connector as backup for the far bay — a legitimate strategy, but a poor substitute for getting the primary placement right.
18 vs. 25 feet: the cable length decision
Most residential chargers ship with cables in the 18-25 foot range, and the choice between them is really a choice about flexibility versus manageability. An 18-foot cable is lighter, easier to coil, cheaper to replace if damaged, and perfectly adequate when the charger mounts on the wall nearest the car's port. For a single car in a standard two-car garage with the charger on the correct wall, 18 feet is usually plenty — with several feet to spare.
A 25-foot cable earns its keep in three scenarios: multi-car garages where one charger serves two bays, driveways where the car can't always park in the ideal spot, and households planning a second EV with an unknown port location. The extra seven feet is the difference between "reaches both bays" and "need a second charger." For the price difference — typically $50-$150 more for the longer cable at purchase — it's inexpensive future-proofing if any of those scenarios apply to you.
The downsides of longer cables are real but manageable. More cable means more weight to handle daily, more coiling, and more cable lying around if your parking spot is close — a 25-foot cable serving a car parked six feet away leaves nineteen feet to manage. Good cable management (a wall hook, a retractor, or a ceiling-mounted system) neutralizes this. What you can't neutralize is a cable that's too short: there's no safe way to extend an EV charging cable, and extension cords are explicitly prohibited for EV charging by code and by every manufacturer.
The decision rule is simple: measure twice. Park the car where it will actually park, measure from the candidate mounting spot to the charge port along the cable's real path — around the bumper, not through it — and add three feet of slack for comfortable handling. If that number is under 15 feet, an 18-foot cable works. If it's 15-20 feet, or if you want multi-bay flexibility, get the 25-footer. Never size a cable to the best case; size it to the Tuesday night when you're tired and parked slightly off.
Serving two cars: one charger, smart placement, or two chargers
Two-EV households have three placement strategies, and the right one depends on driving patterns. Strategy one: a single centrally-mounted charger with a 25-foot cable serving both bays. This works when the cars have complementary schedules — one charges overnight Monday/Wednesday/Friday, the other Tuesday/Thursday — or when daily mileage is low enough that each car only needs charging a few nights per week. It's the cheapest option: one charger, one installation.
Strategy two: one charger now, conduit for a second later. During the initial install, have the electrician run conduit (or at least leave a clear path) to a second mounting location, even if you don't buy the second charger yet. The incremental cost during an open-wall install is a few hundred dollars; retrofitting it later through finished walls can cost $1,000 or more. This is the recommended approach for households that will likely add a second EV within a few years — and most EV households eventually do.
Strategy three: two chargers with load management from day one. If both cars drive significant daily miles, or if your schedule demands both cars charged every night, two chargers on a load-management system share the available circuit capacity intelligently. The electrical infrastructure for this — panel capacity, wire runs — should be planned as a system, not as two independent installs. A licensed electrician can design the pair so the second charger is a simple addition rather than a second project.
Whichever strategy you choose, place the first charger with the second car in mind. A charger jammed into the corner of bay one is useless to bay two; a charger on the shared center wall or the back wall between bays serves both. The marginal cost of central placement during the initial install is zero. The cost of discovering the corner doesn't work, two years later, is a relocation.
Hardwired vs. plug-in: how the connection type affects placement
The hardwired-vs-plug-in decision has placement consequences beyond the obvious. A plug-in charger on a NEMA 14-50 receptacle can be relocated by unplugging it — useful if your first placement guess was wrong, or if you rearrange the garage. But the receptacle itself is fixed, and code requires it to be readily accessible, which constrains where it can go. A hardwired charger is more permanent but allows higher amperage (up to 48-60 amps on appropriate circuits versus 40 amps continuous on a 50-amp receptacle), which matters for large-battery vehicles.
For placement flexibility, plug-in has a real advantage during the learning period. Many owners discover their ideal charger location only after living with the car for a month — the parking spot shifts, the port side surprises them, the workbench moves. A plug-in unit lets you adapt without an electrician. Once the location is proven over a few months, some owners convert to hardwired for the higher amperage; the receptacle box makes a fine junction point for the conversion.
There's also a subtle code consideration: receptacles in garages require GFCI protection under current NEC rules, and GFCI breakers on 50-amp circuits have a known nuisance-tripping interaction with some EV chargers' own ground-fault detection. Hardwired installations avoid this particular headache. Your electrician will know your jurisdiction's current requirements — this is exactly the kind of detail that separates a generic install from a well-engineered one.
Whichever connection type you choose, the placement principles are identical: short cable path to the port, clear of walkways, cable managed off the floor, room for the second car. The connection type determines amperage and relocatability; the placement determines daily satisfaction. Get the placement right and either connection type serves you well.
Future-proofing: placing for the cars you don't own yet
The average homeowner keeps a charger for a decade and a car for far less, which means your charger will almost certainly serve a vehicle you haven't bought yet. Future-proofing placement means assuming the next car's port could be anywhere: mount centrally, buy the longer cable, and keep the cable path clear of obstructions that assume a specific car geometry. A charger placed for today's car on today's wall is a bet that nothing changes; central placement is a bet that everything might.
Electrical future-proofing matters too. If your panel has capacity, have the electrician run wire sized for the next step up — a 60-amp-capable run for a 40-amp charger today costs little extra in materials during the initial install and avoids a complete re-wire when you upgrade. Similarly, if a second EV is even a possibility, the conduit for charger number two should go in now. Wire is cheap when walls are open and electricians are already on site; it's expensive as a standalone project.
Consider the garage's own future. Remodels, added storage, a workbench, a second refrigerator — garages evolve, and charger placement should survive that evolution. Mounting the charger and its cable management high on the wall, clear of floor-level clutter, keeps it functional through most garage rearrangements. And document the install: photos of wire runs inside walls before drywall goes back, the circuit number in the panel, the installer's contact info. Future you — or the home's next owner — will be grateful.
The bottom line on placement is that it's a one-time decision with daily consequences, and the cost of getting it right is measured in minutes of planning, not dollars. Measure the real cable path. Account for the actual port location. Plan for the second car. Buy the longer cable when in doubt. These four habits separate the installs owners love from the installs owners tolerate.
Frequently asked questions
It depends on your layout. Eighteen feet is fine when the charger mounts on the wall nearest the charge port in a standard garage. Twenty-five feet is worth the typical $50-$150 premium for two-car garages, driveways with variable parking, or households planning a second EV. Measure the real cable path and add three feet of slack — never size to the best case.
On the wall that gives the shortest cable path to your car's charge port, clear of walkways and the path from car to house door. For two-EV households, the shared center wall or back wall between bays serves both cars. Balance this against wire-run cost from the panel — every foot of run adds $10-$25 — and have a licensed electrician confirm the plan.
No. Extension cords are explicitly prohibited for EV charging by electrical code and by every charger manufacturer. They're a fire and shock hazard at sustained high current. If the cable doesn't reach, the correct fixes are a longer-cable charger, a relocated charger, or a second charger — not an extension cord.
One centrally-mounted charger with a 25-foot cable works when the cars charge on alternating nights or drive low daily miles. Two chargers with load management suit households where both cars need full charges nightly. The smart middle path: install one now and have the electrician run conduit for a second location during the initial work, when it's cheapest.
Plug-in units on a NEMA 14-50 receptacle can be relocated by unplugging, which helps while you're learning your ideal setup. Hardwired units allow higher amperage and avoid GFCI nuisance-tripping issues some plug-in installs see. Either way, the placement principles are the same — many owners start plug-in and convert to hardwired once the location is proven.
Mount centrally, buy the 25-foot cable, and have the electrician run wire sized for the next amperage step up plus conduit for a possible second charger — all cheap during the initial install. Keep the charger high on the wall, clear of floor clutter, and photograph wire runs before walls close. Your charger will outlast your car; place it for the vehicle you haven't bought yet.