Planning Service Access for Built-In Outdoor Appliances
Plan service access for built-in outdoor appliances: access panels, slide-outs, shutoff placement, the service map, and retrofitting existing islands.
11 MIN READ · UPDATED 2026-09-22
Key takeaways
- Every built-in appliance will need service: planned access ($500–$1,500 during construction) routinely saves thousands in avoided demolition over the kitchen's life.
- Give every shutoff, connection point, and junction box a labeled access panel — 14×18 inches minimum, larger where hands and tools must work — and use tool-free panels for emergency shutoffs.
- Put heavy appliances on slide-out trays ($200–$600 each) with flexible gas, water, and plug-in electrical connections; size cutouts for the appliance category, not just today's model.
- Draw a service map before building — every component, shutoff, panel, and utility run, dimensioned and labeled — and keep a laminated copy in a dedicated service cabinet.
- Write serviceability into trade contracts, hold finishes until every trade confirms access, photograph everything before close-up, and exercise every shutoff twice a year.
Every built-in outdoor appliance has a service story — the igniter that fails in year three, the refrigerator compressor that dies in year six, the gas valve that needs replacing in year eight. The question is never whether an appliance will need service; it is whether servicing it takes twenty minutes through an access panel or two days of demolishing finished stone. Service access is the least glamorous part of outdoor kitchen design and the one with the highest return on investment: a few hundred dollars of planned panels and pull-outs routinely saves thousands in repair costs over the kitchen's life. This guide shows how to design for the repair that is coming.
The Economics of Access: Why This Matters So Much
Put numbers on the problem and the case for access panels designs itself. A built-in grill's gas valve replacement is a $150 part and roughly an hour of labor — when the technician can reach it. When the island was finished with no access, that same repair becomes: demolish a section of stone veneer ($400–$800), perform the one-hour repair, rebuild the veneer ($600–$1,200), and wait two weeks for the mason's schedule. A $300 repair becomes a $1,500 repair with a two-week outage in the middle of grilling season.
Multiply across the kitchen's life. A well-equipped island holds a grill, a refrigerator, an ice maker, a sink with disposal, lighting transformers, GFCI receptacles, and gas and water shutoffs — eight to twelve serviceable points, each of which will need attention at least once in fifteen years. Industry experience suggests a kitchen without planned access will require finish demolition for roughly half of its service events; a kitchen with proper access, for almost none. Over fifteen years, the expected savings run into the thousands — against a planned-access cost of $500–$1,500 during construction. It is the cheapest insurance in the project.
There is a second economy too: diagnostic speed. A technician who can open a panel, see the gas manifold, test the igniter, and check the electrical in twenty minutes bills for twenty minutes. A technician who must work blind through a grill cutout, by feel and flashlight, bills for the better part of a day — if they agree to the job at all. Many appliance techs decline sealed-island work outright, which leaves the homeowner choosing between demolition and replacement. Access is what keeps the kitchen repairable rather than disposable.
Access Panels: Placement, Sizing, and Types
An access panel is a removable section of the island's finish — framed, finished to match, and secured with screws, magnets, or latches — that opens onto a serviceable component. The design rules are simple but routinely violated. Every shutoff gets a panel: gas shutoffs, water shutoffs, and any valve that might need operation in a hurry. Every connection point gets a panel: gas manifolds, electrical junction boxes, GFCI receptacles inside the island, lighting transformers, and drain cleanouts. Every appliance gets service clearance: the space behind and beside a built-in grill or fridge where connections live.
Sizing matters more than people think. A 12-by-12-inch panel sounds reasonable until a technician needs two hands, a wrench, and a flashlight inside it. Minimum practical sizes: 14×18 inches for valve and junction access, 18×24 inches or larger where an appliance slides out or a technician must reach deep. Bigger is better; the cost difference between a small panel and a generous one is trivial during construction and enormous during a repair.
Panel types should match the finish and the frequency of use. Screw-fixed panels finished in matching stone or stucco disappear visually and suit infrequent access (junction boxes, cleanouts). Magnetic or latch panels suit shutoffs that might be needed urgently — no tools, no searching for the screwdriver while gas hisses. Vented panels or louvered doors serve double duty where gas appliances need combustion ventilation: they provide both code-required airflow and service access. Label every panel on the inside — “gas shutoff,” “transformer,” “cleanout” — because the person opening it in five years will not be the person who built it.
Pull-Outs and Slide-Outs: Servicing Heavy Appliances
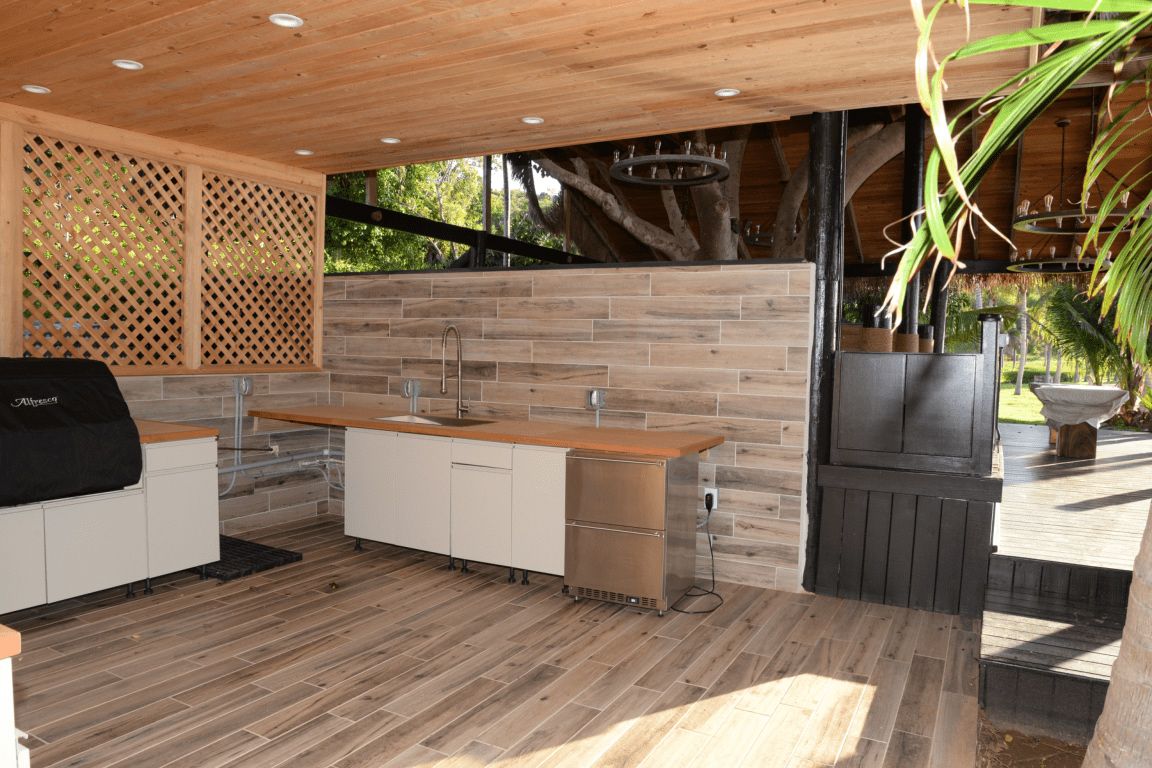
Access panels handle valves and connections. Heavy appliances — grills, refrigerators, ice makers, trash compactors — need a different strategy: they must come out. A built-in grill that cannot slide forward cannot have its burners, igniter, or gas connections serviced without dismantling the island around it.
The professional answer is slide-out trays and pull-out sleds: the appliance sits on a stainless tray or rail system that slides forward out of its cutout, bringing the entire unit — and its rear connections — into the open. Quality slide hardware rated for the appliance's weight runs $200–$600 per appliance, installed during construction. Compare that to the alternative: a grill replacement that requires cutting the countertop wider, or a refrigerator swap that does not fit through the original cutout because the replacement model is half an inch deeper.
Design the cutouts for the category, not the model. Appliance dimensions drift between model years; a cutout built to the millimeter for today's grill may not accept its replacement in eight years. Oversize cutouts slightly within the manufacturer's allowable range, use trim kits to bridge the gap handsomely, and keep the cutout dimensions — and the original appliance's spec sheet — in the project file. For refrigeration, confirm the replacement path physically: can a new unit actually travel from the driveway to the cutout without removing doors, railings, or sections of the island? The delivery path is part of service access, and it is forgotten in a remarkable number of designs.
Flexible connections complete the pull-out strategy. Gas appliances on slide-outs need an approved flexible gas connector with enough slack for the slide distance — specified by the gas fitter, never improvised. Water lines to ice makers and sinks need flexible supply lines with accessible shutoffs. Electrical should terminate in a receptacle the appliance plugs into, not a hardwired connection buried behind the unit. Every rigid connection is a future demolition; every flexible, accessible connection is a future twenty-minute service.
The Service Map: Drawing It Before Building
The single most valuable document in an outdoor kitchen project is one most projects never produce: the service map — a dimensioned drawing showing every serviceable component, every shutoff, every access panel, and every utility run, labeled and filed with the project records. It costs a few hours of design time. It saves thousands across the kitchen's life, because every future technician starts from knowledge instead of exploration.
Build the map as a checklist during design review, before construction:
- Gas: main shutoff location, appliance shutoffs, manifold, flexible connectors, pressure-test points — each with its access panel marked.
- Water: supply shutoffs, drain cleanouts, hose bibbs, ice-maker supply — each accessible without tools beyond a panel.
- Electrical: panel schedule, GFCI locations, junction boxes, transformer, lighting controls — every box reachable.
- Appliances: slide-out direction and clearance, cutout dimensions, delivery path from the street, flexible connection specs.
- Structure: weep paths, ventilation openings, and the locations of any buried utilities for future digging.
Then make two copies: one laminated inside a designated island cabinet (the service cabinet — a dry, accessible cabinet that holds the map, appliance manuals, and a basic kit: the panel screws' driver, spare fuses, the soapy-water leak spray bottle), and one in the house files. When the technician arrives in year seven, hand them the map. Watch their expression change. That expression is worth more than any single upgrade in the kitchen.
Coordinating Trades Around Serviceability
Service access fails most often not in design but in execution — when trades work in sequence without a shared plan. The mason closes the island before the electrician's junction box gets its panel. The gas fitter's shutoff ends up behind the refrigerator's slide path. The plumber's cleanout is accessible only by removing the trash pull-out. Each trade did acceptable work; the kitchen is unserviceable anyway.
Preventing this is a management task, and it belongs to whoever runs the project — the general contractor on a full build, or the homeowner on a trade-direct project. The tools are simple: a pre-construction meeting where every trade sees the service map and signs off on their access points; a rule that no finish goes on until every trade confirms their service points are accessible; and a final walkthrough where each access panel is opened, each shutoff is operated, and each appliance is slid out and back in — before final payment.
Write serviceability into the contracts. The island builder's scope should name the access panels, their sizes, and their locations. The plumber's and electrician's scopes should require accessible shutoffs and labeled boxes. The appliance installer's scope should include demonstrating the slide-out. Vague scopes produce vague access; specific scopes produce a serviceable kitchen. And photograph everything before close-up — every utility run, every connection, every box — with the photos filed by location. In five years, those photos are the difference between a confident repair and exploratory demolition.
Retrofitting Access Into an Existing Island
Many readers will be looking at an existing island with no access panels and wondering if the situation is fixable. It usually is — and it is worth doing proactively, before the first failure forces the issue. A mason or skilled handyman can cut access openings into stone veneer or stucco and fit finished panels for $200–$500 per opening, a fraction of emergency demolition costs. Prioritize in this order: gas shutoffs first (safety), then water shutoffs and cleanouts, then electrical boxes, then appliance slide paths.
The retrofit assessment starts with investigation, not cutting. Use the original plans if they exist; otherwise, a careful technician can often map utilities with a combination of visual tracing from the house panel and meter, gentle exploratory openings, and — for complex islands — a borescope through a small test hole. Know what is inside before opening it up: cutting into a gas line or a live electrical run turns a service upgrade into an emergency.
While retrofitting, fix the flexible-connection problem too. If the grill is hard-piped with no slack, have the gas fitter convert the final connection to an approved flexible connector during the same visit. If the refrigerator is hardwired, have the electrician convert it to a plug-and-receptacle connection. Each conversion is a few hundred dollars and each converts a future demolition into a future slide-out. And create the service map retroactively — walk the island with the technician, document everything found, label the new panels, and file it. A retrofitted kitchen with a map is more serviceable than a new kitchen without one.
The Maintenance Routine That Uses the Access
Access panels only pay off if someone opens them — so build the routine that uses them. Twice a year, at the start and end of grilling season, spend thirty minutes with the service map: open every panel, operate every shutoff (valves that sit for years seize; exercising them keeps them working), check flexible gas connectors with soapy water, confirm GFCI receptacles trip and reset, look for water intrusion, corrosion, or pest evidence inside the island, and verify the lighting transformer and connections are clean and dry.
Annually, go deeper: have the gas fitter or a qualified technician inspect the gas system — many offer a seasonal service visit for $150–$300 that covers leak checks, burner cleaning, and igniter testing. Have the electrician verify the outdoor circuits every few years, or sooner if breakers trip or GFCI devices age out. Keep a simple log — dates, what was checked, what was found — in the service cabinet with the map. The log turns maintenance from a vague intention into a record, and it is genuinely useful at resale: a buyer who sees a maintained, documented, serviceable kitchen bids with confidence.
Total planned-access investment during construction: $500–$1,500 for panels, slide hardware, and the design time to place them. Total expected savings over fifteen years: several thousand dollars in avoided demolition, faster cheaper service visits, and appliances that get repaired instead of replaced. Costs are 2026 US market ranges; get itemized local quotes. Design for the repair that is coming — because it is — and the outdoor kitchen stays what it was meant to be: the easiest room in the house to love, and the easiest to keep.
Frequently asked questions
Because every built-in appliance — grill, refrigerator, ice maker, disposal — will need service within its life, and without planned access a $300 valve replacement becomes a $1,500 demolition-and-rebuild. Access panels at shutoffs, connections, and junction boxes let technicians work in minutes instead of days. Planned during construction they cost $500–1,500 total; retrofitted under emergency conditions they cost far more.
At every gas and water shutoff, every gas manifold and flexible connection, every electrical junction box and GFCI inside the island, the lighting transformer, and every drain cleanout. Size them generously — 14x18 inches minimum, 18x24 or larger where an appliance slides out. Use tool-free magnetic or latch panels for emergency shutoffs, and label every panel on the inside.
With a slide-out tray or rail system ($200–$600 installed) that lets the grill slide forward out of its cutout, bringing rear connections into the open — paired with an approved flexible gas connector with slack for the slide distance. Design cutouts for the appliance category rather than the exact model so replacements fit years later, and confirm the delivery path from the street to the cutout.
Usually yes. A mason can cut openings into stone veneer or stucco and fit finished panels for $200–$500 per opening. Prioritize gas shutoffs first, then water shutoffs and cleanouts, then electrical. Map the utilities with plans or careful investigation before cutting — never cut blind into an island that may contain gas lines or live electrical.
A dimensioned drawing showing every serviceable component, shutoff, access panel, and utility run, labeled and filed with the project records. It is the most valuable document in the project: future technicians start from knowledge instead of exploration, which means faster, cheaper repairs. Keep a laminated copy in a dedicated service cabinet in the island along with appliance manuals.
Twice a year — at the start and end of grilling season, open every access panel, operate every shutoff, check gas connections with soapy water, test GFCIs, and look for water, corrosion, or pests. Annually, have a qualified technician service the gas system ($150–$300). Keep a simple maintenance log in the service cabinet; it documents care that buyers value at resale.