Range Hoods for Induction Cooktops: CFM Guide 2026
Range hood CFM for induction cooktops: why induction changes the ventilation math, how to size capture correctly, and 2026 costs for quiet, effective hoods.
10 MIN READ · UPDATED 2026-09-22
Key takeaways
- Induction cooktops need less raw CFM than gas but more attention to capture area — size for the cooking surface, not just the BTU formula.
- A good rule: 100 CFM per linear foot of cooktop width for induction, with a hood 6 inches wider than the cooktop.
- Prioritize capture (depth, mounting height, quiet variable-speed blowers) over headline CFM numbers.
- Ducted hoods vented outside outperform recirculating models dramatically — plan the duct route before buying.
- Makeup air is required by code above 400 CFM in most jurisdictions; factor $800-$2,500 into the project.
Switching to an induction cooktop changes the ventilation equation in ways most kitchen designers get wrong. The old rule of thumb — 100 CFM per 10,000 BTU — was written for gas, where combustion byproducts and waste heat demanded brute-force exhaust. Induction puts nearly all its energy into the pan, which means you need less raw airflow but far better capture: the plume from a ripping-hot sear behaves the same no matter what heated the pan. Undersize the hood and your $4,000 cooktop fills the house with grease and smoke; oversize it and you have bought noise, a makeup-air headache, and money wasted. This guide gives you the 2026 sizing math, the capture principles that matter more than CFM, and real installed costs.
Why induction changes the ventilation math
A gas burner wastes 60 percent or more of its energy heating the kitchen air around the pot — that waste heat, plus combustion byproducts like nitrogen dioxide, carbon monoxide, and water vapor, is what the old CFM rules were really exhausting. An induction element transfers 85 to 90 percent of its energy directly into magnetic cookware, so the ambient heat load plummets and there are zero combustion byproducts. On paper, that suggests a much smaller hood.
But the cooking plume does not care about your heat source. Searing a steak at 500°F, stir-frying, or boiling pasta generates grease aerosols, steam, smoke, and fine particulates in quantities dictated by the food and the temperature — not by the burner technology. That plume rises at roughly the same velocity and spreads at roughly the same angle whether the heat came from gas or induction. So the hood's real job — capturing a rising thermal plume before it escapes into the room — is unchanged. What changes is that you are ventilating the cooking, not the combustion.
The practical consequence: induction lets you drop 100 to 200 CFM versus an equivalent gas setup, but it does not let you shrink the hood. Capture area, mounting height, and hood depth matter just as much as ever — arguably more, because buyers who "need less CFM" are tempted to buy smaller hoods, which is exactly backwards. Size the hood for the plume, then size the blower for the hood.
The 2026 CFM sizing rules for induction
Forget the BTU formula — induction cooktops are rated in watts or kilowatts, and the gas rules do not translate. The working rule for induction in a residential kitchen is 100 CFM per linear foot of cooktop width: a 30-inch cooktop wants about 250 to 300 CFM, a 36-inch cooktop wants 300 to 450 CFM, and a 48-inch range-style induction unit wants 500 to 600 CFM. Adjust upward if you sear, stir-fry, or grill indoors regularly; adjust downward for a small galley kitchen where a smaller hood still covers the plume.
Ceiling height modifies the math. The rule above assumes a standard 8-to-9-foot ceiling with the hood mounted 30 to 36 inches above the cooktop. With 10-foot-plus ceilings and a chimney-style hood, add roughly 100 CFM per extra foot of duct height to overcome the longer capture distance and added static pressure. Island installations deserve a bump too — cross-drafts from foot traffic and HVAC registers disrupt the plume, so island hoods should be sized at the top of the range or one step up in width.
Treat manufacturer CFM ratings skeptically. Published CFM is measured at zero static pressure — no ductwork, no elbows, no cap. Real installed airflow through 20 feet of duct with two elbows can be 30 to 50 percent lower. A hood rated 600 CFM on a long duct run may deliver 350 CFM at the cooktop. This is why duct design (short, straight, smooth rigid metal, properly sized — typically 8-inch round for 400+ CFM) matters as much as the blower rating, and why a quality 400-CFM hood on a clean duct run outperforms a cheap 900-CFM unit strangling through flex duct.
Capture beats CFM: hood size, depth, and mounting
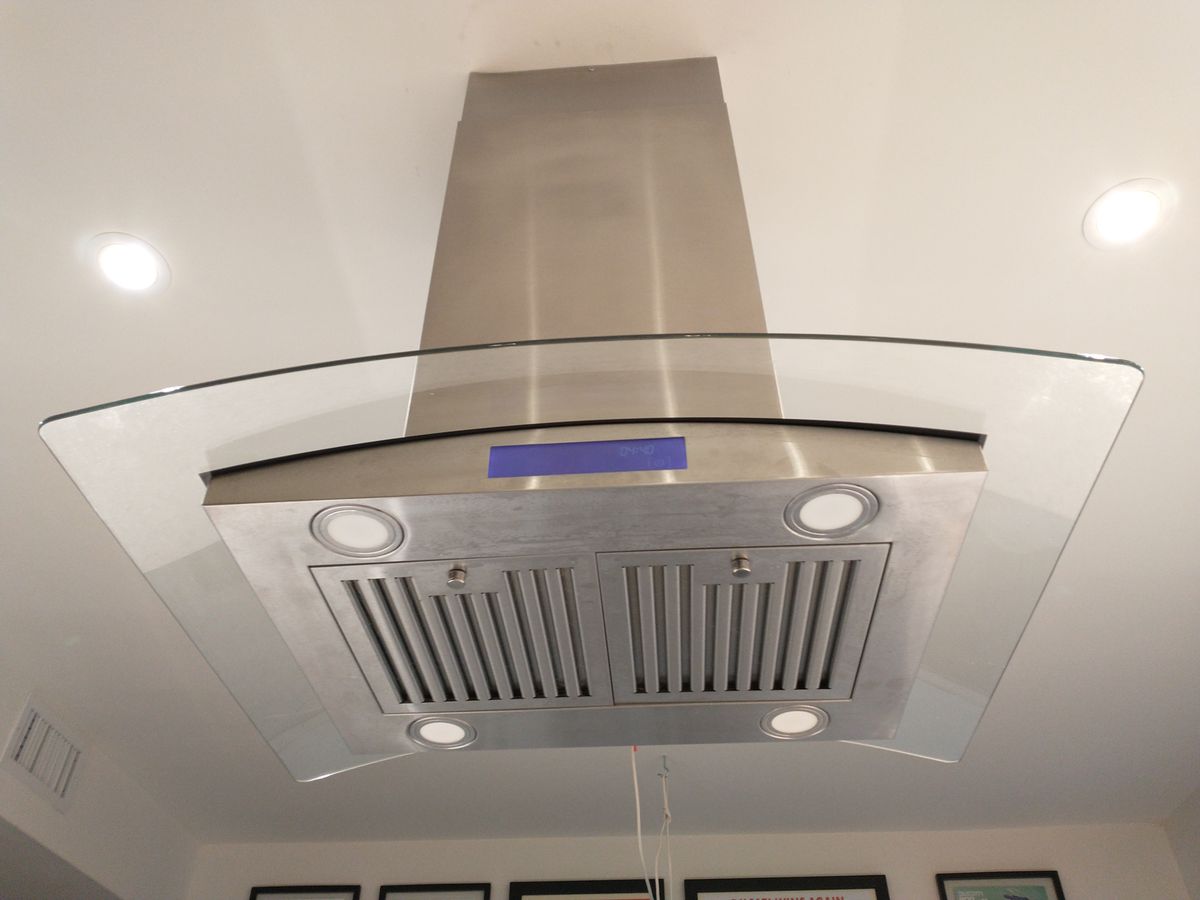
Capture efficiency — the share of the plume the hood actually catches — is governed by geometry. The hood should be at least as wide as the cooktop and ideally 3 to 6 inches wider on each side: a 36-inch cooktop wants a 42-inch hood. Depth matters equally; a 24-inch-deep hood captures far more than an 18-inch microwave-hood combo, because the plume spreads as it rises and the front burners sit forward of a shallow hood's edge. This is the single most common residential mistake: a 30-inch over-the-range microwave "hood" over a 36-inch cooktop, capturing perhaps half the plume on a good day.
Mounting height is the other half of capture. Most manufacturers specify 24 to 36 inches above the cooking surface; the sweet spot for capture is 30 to 32 inches. Every inch higher lets the plume spread wider before it reaches the hood, and beyond 36 inches even a well-sized hood starts missing the edges. If household members are tall and head clearance is a concern, choose a deeper hood or a model with a tapered profile rather than mounting higher — raising the hood is the most expensive inch in kitchen ventilation.
Blower type affects real-world use more than the spec sheet suggests. Variable-speed blowers let you run quietly at low speed for simmering — where most cooking actually happens — and ramp up only for searing. A hood that is too loud on its lowest usable setting simply will not get used, which makes a 1.5-sone low speed worth more than an extra 200 CFM on paper. Look for published sone ratings, not just CFM, and test-drive the hood in a showroom if possible: perceived loudness varies enormously between designs at the same CFM.
Ducted vs. recirculating: plan the duct route first
A ducted hood vented to the exterior is categorically better than a recirculating hood — this is not close. Ducted hoods remove heat, moisture, grease, and particulates from the house entirely. Recirculating hoods pass air through grease mesh and charcoal filters and blow it back into the kitchen: they catch some grease and odor, but the moisture and fine particles stay. In a tight, well-insulated 2026 home, dumping a pasta pot's worth of steam back into the kitchen is a humidity problem, not a solution.
Plan the duct route before you buy the hood, because the route determines what is possible. The ideal is a short, straight vertical run through the roof — minimal static pressure, maximum delivered CFM. Horizontal runs through walls work but add elbows; every 90-degree elbow costs roughly the equivalent of 10 feet of straight duct in pressure drop. Use smooth rigid metal duct, never flex, and size it to the hood: 6-inch round is fine to about 400 CFM, 8-inch for 400 to 800 CFM. Terminate with a proper roof or wall cap with a backdraft damper, not a generic vent.
If ducting is genuinely impossible — a condo with no exterior wall access, a historic interior kitchen — a recirculating hood with quality charcoal filters is better than nothing, and induction's lack of combustion byproducts makes the compromise less bad than with gas. Budget $50 to $100 a year for charcoal filter replacements and be honest about the limitation: it manages odor and some grease, not air quality. For everyone else, the $500 to $1,500 in ductwork is the highest-value money in the project.
Makeup air, codes, and permits
Here is the part that surprises buyers of big hoods: exhaust air must be replaced. A 600-CFM hood in a tight modern home can pull the house several pascals negative, backdrafting fireplaces, water heaters, and furnaces — pulling carbon monoxide into the living space. That is why the International Residential Code and most local codes require makeup air for hoods exhausting over 400 CFM, interlocked with the hood so it opens automatically when the blower runs.
A code-compliant makeup-air system — typically a dampered duct bringing outdoor air to the return plenum or a dedicated diffuser, sometimes with tempering in cold climates — adds $800 to $2,500 to the project depending on complexity. Tempered makeup air (a small duct heater taking the edge off winter air) sits at the top of that range but is worth it in cold climates, where dumping 500 CFM of 10°F air into the house every time you sear is its own comfort disaster. Your HVAC contractor, not the appliance salesperson, should design this.
Permits apply to the ductwork and electrical in most jurisdictions, and the makeup-air interlock will be inspected. Check your local amendments before buying: some jurisdictions have lowered the makeup-air threshold to 300 CFM, and a few require it for any ducted hood regardless of rating. Buying a 900-CFM pro-style hood for a 30-inch induction cooktop and discovering the makeup-air requirement at inspection is an expensive lesson — size the hood to the cooking first, and the code compliance follows naturally.
2026 costs and what to buy
Installed 2026 costs for the full project: a quality 36-inch ducted wall-mount hood runs $800 to $2,500 for the unit; island hoods $1,500 to $4,000; professional installation $400 to $900; ductwork $500 to $1,500; makeup air $800 to $2,500 where required. All-in, a well-executed 36-inch induction ventilation project typically lands at $2,500 to $7,000, with premium designer hoods and complex duct routes pushing past $10,000. Costs are 2026 US market ranges; get itemized local quotes.
What to prioritize in the purchase: verified sone ratings at multiple speeds, dishwasher-safe baffle filters (mesh filters clog and are miserable to clean — baffles are the pro choice), a hood 6 inches wider than your cooktop, and a blower sized to the duct run you actually have. Nice-to-haves include heat sensors that auto-ramp the blower, filter-cleaning reminders, and LED lighting with decent color rendering for judging food. Skip gimmicks like gesture control unless you value novelty over reliability.
Hire a licensed electrician for the circuit and a qualified HVAC or sheet-metal contractor for the ductwork — the hood itself is the easy part. And time the project with the cooktop installation: the electrician is already there for the 40- or 50-amp induction circuit, and combining trades saves a service call. Done right, the hood disappears into the kitchen's background — quiet on simmer, powerful on sear, and the reason your open-plan home does not smell like last night's stir-fry.
Noise: the spec that determines whether the hood gets used
A range hood that is too loud on its lowest useful setting simply will not get used — and an unused hood is a decoration. Loudness is measured in sones, and the numbers matter enormously: 1 sone is about as loud as a quiet refrigerator, 4 sones is normal conversation, and 8+ sones is a busy restaurant. For an induction cooktop, where most cooking happens at a simmer or sauté rather than a wok hei inferno, the low-speed sone rating is the number that governs daily life. Target under 2 sones at the speed you will actually use for everyday cooking.
Two design choices drive quiet operation. Remote blowers — mounted in the attic or on the roof rather than in the hood — remove the loudest component from the kitchen entirely, dropping perceived noise by half or more; they add $300 to $800 to the project but are the single best noise upgrade available. Oversizing slightly also helps: a 600-CFM blower loafing at 40 percent is dramatically quieter than a 300-CFM blower screaming at full tilt to move the same air. This is the legitimate case for buying more CFM than the minimum — not for capture, but for the luxury of low, quiet speeds that still move enough air.
Frequently asked questions
Plan on 300-450 CFM for a 36-inch induction cooktop in a typical home kitchen — roughly 100 CFM per linear foot. Heavy searing or wok cooking pushes toward the top of that range, while a 30-inch cooktop used for everyday cooking is well served by 300 CFM with good capture.
Yes. Induction eliminates combustion byproducts, but cooking still produces grease, steam, smoke, and fine particulates — searing a steak generates the same plume regardless of heat source. Ventilation protects your cabinets, air quality, and finishes.
You can, but it is a compromise: recirculating hoods filter grease and some odor through charcoal but return heat and moisture to the kitchen. If your remodel allows any duct path to the exterior, a ducted hood performs dramatically better and is worth the extra $500-$1,500 in ductwork.
Most manufacturers specify 24-36 inches above the cooking surface for wall-mount and island hoods. Mounting lower improves capture but risks head clearance and heat exposure; higher than 36 inches lets the plume spread beyond the hood's capture zone.
Makeup air replaces the air your hood exhausts so the house does not go negative — which can backdraft fireplaces and water heaters. Most codes require it for hoods over 400 CFM. Expect $800-$2,500 for a dampered makeup-air system, and check your local code before buying a high-CFM hood.
Rarely. Downdrafts fight physics — hot cooking plumes rise, and a downdraft must overpower that buoyancy. They underperform overhead hoods on every test. Choose a downdraft only when an overhead hood is truly impossible, and size the CFM generously.