Accessible Thermostats: Big Screens & Voice Control
Accessible thermostats for aging in place: big-screen and voice-control options, simplified interfaces, smart placement, costs $80-$300, and pro setup tips.
10 MIN READ · UPDATED 2026-09-23
Key takeaways
- The best aging-in-place thermostat shows the temperature big and offers exactly three actions: warmer, cooler, maybe a mode toggle.
- Voice control via a smart speaker sidesteps the wall unit entirely — transformative for wheelchair users and severe arthritis.
- Mount the primary thermostat at 44-48 inches: reachable seated, readable without bifocal neck strain.
- Use PIN locks and setpoint range limits early to prevent confused-programming incidents and $300-$600 surprise bills.
- Remote temperature alerts for a family member catch HVAC failures before pipes freeze or health suffers.
The thermostat is the most-touched control in the house and one of the least accessible: tiny touchscreens, cryptic icons, menus three layers deep, and text too small to read without glasses. For aging eyes and stiff hands, a bad thermostat means living too hot, too cold, or afraid to touch the thing at all — and for households with cognitive changes, it can mean a $400 energy bill from a system left fighting itself. This guide covers big-screen thermostats, voice control, simplified interfaces, and the placement and setup details that make climate control genuinely effortless.
What Makes a Thermostat Hard to Use — and What Fixes It
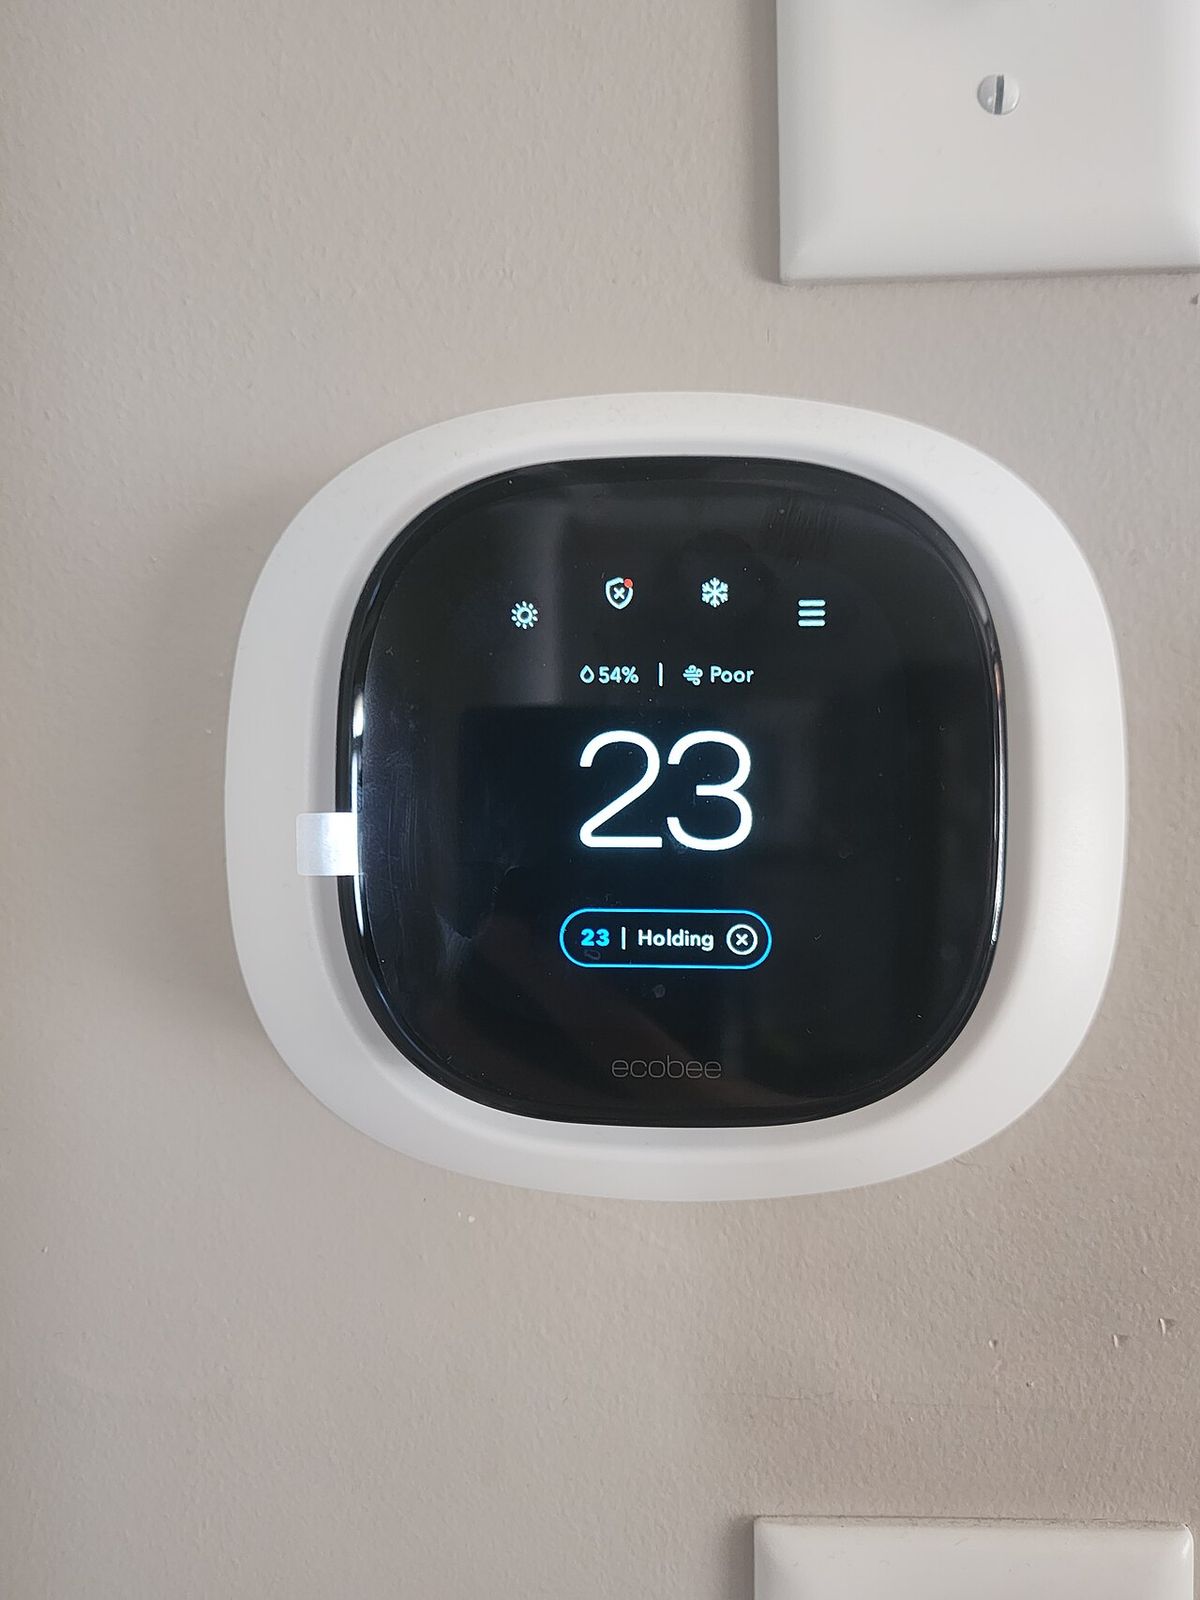
Start by diagnosing the actual barriers, because "hard to use" breaks into distinct problems with distinct fixes. Vision: small gray-on-white text, low-contrast icons, and screens that wash out in bright rooms. The fix is a large, high-contrast display — look for thermostats with 3.5-inch-plus color screens, big numerals (at least 3/4 inch tall for the temperature), and adjustable brightness. Some models offer a dedicated large-text or high-contrast accessibility mode; if the showroom demo doesn't show one, ask — it's sometimes buried in settings.
Dexterity: tiny capacitive touch buttons with no tactile feedback, swipe gestures, and twist-dial interfaces that demand fine motor control. The fix is physical buttons or a simple tap interface with large touch targets — at minimum, buttons you can operate with a knuckle or the side of a finger rather than a precise fingertip. Avoid thermostats whose entire interface is a rotating ring if grip strength is limited.
Cognition: nested menus, scheduling systems that require programming logic, and modes (heat/cool/auto/aux/emergency) that confuse anyone. The fix is radical simplification: a thermostat that shows the current temperature big, the set temperature bigger, and offers exactly three actions — warmer, cooler, and maybe a mode toggle. Everything else (schedules, away modes, energy reports) should live in the app for a family member to manage remotely, not on the wall unit. The best aging-in-place thermostat is one the resident never has to "program" at all.
Best Thermostat Types for Vision and Dexterity Needs
Three categories serve aging households well, each with trade-offs. Large-display smart thermostats ($150 to $300) from the major smart-home brands offer big color touchscreens, remote app control for family members, voice-assistant integration, and learning or scheduled setbacks that run themselves. Their weakness is interface complexity on the wall unit itself — mitigate it by locking the schedule in the app and teaching the resident only the up/down tap. Enable any "simple display" or lock-screen mode that hides menus behind the basic temperature view.
Simplified accessible thermostats ($80 to $200) are designed specifically for low-vision and low-dexterity users: extra-large numerals, tactile buttons with audible clicks, high-contrast displays, and minimal menus. They typically lack Wi-Fi and app control, which is a feature, not a bug, for users who find connectivity confusing — but it means no remote monitoring for family. For a household where simplicity outranks smarts, these are the right call.
Voice-controlled setups sidestep the wall unit entirely: a smart thermostat paired with a voice assistant ($50 to $130 for the speaker/display plus the thermostat) lets the resident say "set the temperature to 72" from anywhere in the room. This is transformative for wheelchair users (no need to reach the wall unit), people with severe arthritis, and anyone with low vision. The catch is reliable Wi-Fi and a household comfortable with a listening device — a conversation worth having honestly, since the best tech is the tech everyone consents to. Professional installation ($150 to $300 including wiring check) is wise for any hardwired thermostat swap.
Placement, Mounting Height, and Readability Details
Where the thermostat lives matters as much as which one you buy. Standard mounting height is about 52 to 60 inches — fine for standing adults, but too high for wheelchair users, who need controls between 15 and 48 inches per accessibility guidelines, and uncomfortable for anyone who must look up through bifocals (the classic "tilt head back to read the thermostat" maneuver). In an aging-in-place remodel, mount the primary thermostat at 44 to 48 inches: reachable from a seated position, readable without neck strain.
Location rules beyond height: keep thermostats off exterior walls (temperature readings skew), away from direct sunlight, drafts, supply vents, and heat sources like lamps or TVs — all of which fool the sensor and cause the system to over- or under-run. Interior hallway walls near the bedrooms give the most representative reading for comfort where it matters most. In larger homes, this is the moment to consider zoning or remote sensors ($200 to $500 per zone for sensor-based systems): a remote sensor in the primary bedroom ensures the sleeping space holds temperature instead of the hallway, which is where comfort complaints actually originate.
Lighting around the thermostat deserves a thought: a unit mounted in a dim hallway with a non-backlit display is unreadable regardless of font size. Choose backlit or self-illuminated displays, and if the hallway is dark, add a small nightlight nearby — a $10 fix for a daily frustration. And label nothing with a label maker if you can avoid it; if the interface needs labels to be usable, it's the wrong interface.
Voice Control and Smart-Home Integration Done Right
Voice control is the closest thing to a universal accessibility interface, but it needs deliberate setup to be reliable. Use a dedicated smart speaker or display in the rooms where temperature adjustments happen most — bedroom and living room at minimum — rather than relying on a phone app that requires finding the phone, unlocking it, and navigating to the right screen. A smart display ($80 to $230) doubles as a large-format clock, weather display, and video-call screen for family, which helps it earn its counter space.
Set up routines, not just commands. "Good night" can drop the temperature two degrees, confirm the doors are locked, and turn off the lights — one phrase replacing a multi-room evening circuit that's genuinely taxing with limited mobility. "I'm cold" can nudge the setpoint up two degrees without anyone needing to know the current setting. Keep a short printed cheat-sheet of the five or six phrases the household actually uses near the speaker until they're habit.
Reliability engineering matters: put the thermostat and the voice assistant on an uninterruptible power supply ($60 to $150) if outages are common, since a dead smart thermostat in winter is worse than a dumb one. Maintain one non-voice fallback — the wall unit's basic up/down must remain operable if Wi-Fi drops. And set up remote monitoring for a trusted family member: app alerts for extreme indoor temperatures (below 60°F or above 85°F) catch HVAC failures or confused-programming incidents before pipes freeze or health suffers. That alert is arguably the highest-value feature in the entire setup.
Protecting Against Confusion, Misuse, and Energy Waste
In households with cognitive changes, the thermostat becomes a risk surface: a system set to heat and cool simultaneously, emergency heat left on for weeks, or a schedule accidentally wiped can mean $300 to $600 surprise bills — or a dangerously cold house. The defenses are straightforward. First, lock the thermostat: most smart models offer a PIN lock or range-limit feature that caps how far the setpoint can move (say, 68-76°F) while leaving basic adjustment free. Use it early, before there's a problem — it's easier to frame as a feature than a restriction.
Second, remove complexity from the wall. If the thermostat supports a simplified or "guest" display mode, enable it. Cover or ignore advanced menus. The resident's interface should be: see temperature, tap up, tap down. Everything else — schedules, away detection, filter reminders — belongs to the family member's app. Third, automate the schedule so manual input is rarely needed: gentle setbacks overnight, comfortable mornings, modest away savings. A well-automated system needs touching maybe twice a year at season changes.
Fourth, watch the auxiliary/emergency heat trap. Heat-pump systems with electric backup heat can quietly run the expensive auxiliary strips if the thermostat calls for large temperature jumps or if "emergency heat" gets switched on accidentally. Modern thermostats manage this automatically, but verify the installer configures auxiliary lockout temperatures correctly — and if anyone in the home might flip the system to "em heat," consider whether that mode should be PIN-protected too. A single confused winter of auxiliary heat can cost more than the thermostat itself.
Climate, Health, and Medical Considerations
For aging households, thermostat settings aren't just comfort — they're health infrastructure. Older adults regulate body temperature less efficiently and are more vulnerable to both heat and cold stress; physicians commonly recommend keeping homes between 68 and 78°F year-round for seniors, with extra attention during heat waves and cold snaps. A thermostat with remote monitoring lets family confirm those ranges are actually holding during extreme weather, when it matters most.
Humidity control deserves equal billing. Dry winter air aggravates respiratory conditions and skin, while excessive humidity encourages mold — a particular concern in bathrooms and basements. Thermostats with integrated humidity sensing ($180 to $320 models) display relative humidity alongside temperature and can coordinate with whole-home humidifiers or dehumidifiers. Aim for 30 to 50 percent relative humidity indoors; if the thermostat shows persistent readings outside that band, it's a signal to address the HVAC system or building envelope, not just the setpoint.
Finally, coordinate with medical equipment needs. Supplemental oxygen concentrators, CPAP machines, and some medications are sensitive to extreme heat; nebulizers and respiratory therapies work best in stable, moderate conditions. If anyone in the home uses such equipment, discuss target temperature and humidity ranges with their care team and program the thermostat's schedules around therapy times — cool, stable sleeping conditions for CPAP users, for example. The thermostat becomes part of the care plan, which is exactly why it should be simple, reliable, and remotely monitored.
Costs, Installation, and Working With an HVAC Pro
Budget realistically for the full project, not just the device. Hardware: simplified accessible thermostats $80 to $200; large-display smart thermostats $150 to $300; voice assistant speakers/displays $50 to $230 each; remote room sensors $40 to $80 each. Installation: $150 to $300 for a straightforward thermostat swap by an HVAC technician, including verifying the C-wire (the common wire that powers smart thermostats — older homes often lack it, and adding one runs $100 to $250). Extras: zoning or sensor-based upgrades $200 to $500 per zone; UPS backup $60 to $150.
A complete accessible climate-control upgrade — quality smart thermostat, two voice-assistant displays, three room sensors, professional install with C-wire — lands between $700 and $1,600 for most homes. That's excellent value against the risks it mitigates: one prevented frozen-pipe incident or one avoided winter of auxiliary-heat confusion pays for the project several times over.
Always use a licensed HVAC technician for the install, not just a handyman: thermostat wiring errors can damage the HVAC control board (a $300 to $800 part), misconfigured heat-pump settings waste enormous energy, and the tech can simultaneously verify the system is running efficiently — refrigerant charge, airflow, filter status. Ask them to walk the resident through the simplified interface before leaving, set up the family member's remote app access, configure temperature alerts, and leave a one-page "how to adjust the temperature" sheet on the fridge. The best installation ends with the resident confidently tapping the screen once, not with a manual nobody will read. Costs are 2026 US market ranges; get itemized local quotes.
Frequently asked questions
Look for a thermostat with a 3.5-inch-plus high-contrast color display, numerals at least 3/4 inch tall, and adjustable brightness — or a simplified accessible model designed for low-vision users with tactile buttons and audible clicks. Even better, pair any smart thermostat with a voice assistant so temperature changes need no screen at all. Always test readability in the showroom under bright light, since screens wash out differently.
Yes — most major smart thermostats integrate with popular voice assistants, letting you say 'set the temperature to 72' from anywhere in the room. Place a smart speaker or display in the bedroom and living room so no phone is needed. Set up routines like 'good night' to adjust temperature, confirm locks, and turn off lights with one phrase. Keep Wi-Fi reliable and maintain the wall unit's basic buttons as a fallback.
Use three defenses together: enable the thermostat's PIN lock or setpoint range limit (e.g., 68-76°F) so basic adjustment stays free but extremes are blocked; switch the wall unit to a simplified display mode hiding all advanced menus; and automate the schedule in the family member's app so manual input is rarely needed. Also configure remote temperature alerts so a trusted person is notified of extreme indoor readings.
Most smart thermostats require a C-wire (common wire) for continuous power; many older homes lack one. An HVAC technician can add a C-wire for $100-$250, or some models offer power-adapter kits as alternatives. Don't skip this step or improvise wiring — incorrect thermostat wiring can damage the HVAC control board, a $300-$800 part. Have a licensed tech verify wiring during installation.
Accessibility guidelines place operable controls between 15 and 48 inches above the floor. For an aging-in-place home, mounting the primary thermostat at 44-48 inches works well: reachable from a seated position and readable without the bifocal head-tilt. Keep it on an interior wall away from sunlight, drafts, vents, and heat sources so the sensor reads accurately.
Hardware runs $80-$200 for simplified accessible models or $150-$300 for large-display smart thermostats, plus $50-$230 per voice-assistant speaker. Professional installation is $150-$300 including a wiring check (add $100-$250 if a C-wire must be run). A complete setup — smart thermostat, two voice displays, room sensors, pro install — lands between $700 and $1,600, excellent value against the cost of one HVAC confusion incident.