Basement HVAC: Heating & Cooling Below Grade
Basement HVAC guide for 2026: heating and cooling below-grade spaces — ductwork, dedicated dehumidification, code, and real installed costs.
10 MIN READ · UPDATED 2026-09-22
Key takeaways
- Basements are a moisture-first, temperature-second climate: size by Manual J (the load is smaller than square footage suggests) and never skip dedicated dehumidification.
- Extend existing ductwork only when the equipment has verified spare capacity; choose dedicated mini-split or ducted equipment when the basement's use differs from upstairs.
- Insulate and seal all basement ductwork, supply high and return low, and never enclose fuel-burning appliances without verified combustion air.
- Hold finished basements at 45–50% relative humidity with a ducted dehumidifier on independent humidistat control — AC alone cannot do this on mild humid days.
- Pull mechanical and electrical permits, test for radon before drywall, and make a Manual J a condition of every quote.
Finishing a basement doubles your living space on paper — and then the first summer arrives, and the beautiful new media room is clammy, smells faintly musty, and somehow both too cold and too humid at once. Below-grade spaces are a different climate from the rest of the house: cooler, damper, and slower to respond, with moisture dynamics that punish HVAC designs copied from upstairs. Getting basement comfort right means dedicated thinking about loads, ductwork, dehumidification, and code — not just extending a few ducts and hoping. Here is the complete 2026 guide.
Basements Are a Different Climate: Understanding the Load
A basement’s heating and cooling load looks nothing like an upstairs room of the same size. Surrounded by earth on three or four sides, the below-grade walls lose heat slowly and steadily year-round — the ground is a massive thermal moderator, cool in summer and cool in winter. The result: basements need far less heating and cooling capacity than their square footage suggests, but they need dehumidification far more. The dominant load is latent (moisture), not sensible (temperature).
This is where most basement HVAC goes wrong. Contractors who size by square footage install equipment far too large for the actual load; the oversized system short-cycles, never runs long enough to wring moisture from the air, and leaves the space cold and clammy — the classic finished-basement complaint. The correct approach is a Manual J load calculation that accounts for below-grade walls, minimal glazing, and the earth’s moderating effect. Expect the calculated load to surprise you with how small it is. That is not an error; it is the physics.
Moisture deserves respect beyond comfort. Relative humidity consistently above 60 percent feeds mold in wall cavities, musty odors in fabrics, and deterioration of finishes — damage that hides behind drywall for years. A finished basement without a moisture strategy is a renovation with an expiration date. Every decision below assumes you want this space to last decades, not just look good for the listing photos.
Extend the Existing System or Install Dedicated Equipment?
The first fork in the road: tap into the home’s existing HVAC or give the basement its own equipment. Extending existing ductwork is the cheapest path — adding supply runs and a return to the current system — and it works when three conditions hold: the existing equipment has spare capacity (verified by load calc, not assumed), the duct system can handle the added airflow without excessive static pressure, and the basement’s needs roughly track the rest of the house seasonally. In practice, that describes mild-climate homes with modest basement build-outs.
Dedicated equipment — usually a ductless mini-split or a compact ducted unit serving only the basement — is the better answer when the basement will be used differently from upstairs: a home theater that needs cooling while the upstairs needs heat, a gym generating its own heat and humidity, a guest suite occupied sporadically. Independence means the basement gets exactly what it needs without dragging the whole house along. It also sidesteps the capacity question entirely.
The honest middle ground many contractors recommend: extend the existing system for baseline conditioning and add a dedicated dehumidifier for moisture control (more on that below). This recognizes the real load split — the existing system handles the small sensible load fine, while moisture needs its own dedicated solution. Have a licensed HVAC contractor run the numbers both ways; the load calculation, not the quote’s bottom line, should decide.
Ductwork Below Grade: Design Rules That Prevent Regret
Basement ductwork lives in a space where condensation is the enemy. Supply ducts carrying cold air through a humid basement — or worse, through an unconditioned crawl space to reach the basement — will sweat, and sweating ducts drip onto ceilings. The rules: insulate all supply ductwork in the basement, seal every joint with mastic, and keep ducts inside the conditioned envelope wherever possible. Soffits that hide duct runs should be designed with access panels at dampers and connections; burying everything permanently is how simple future repairs become drywall demolition.
Register placement follows basement logic: supplies high on walls or in the ceiling throwing down into the occupied zone, and returns low near the floor where the coolest, dampest air settles. This high-supply, low-return pattern continuously pulls the problem air — cool and humid — back to the equipment while delivering conditioned air where people actually sit and stand. It is the opposite of what works upstairs, which is exactly why copying the upstairs design fails.
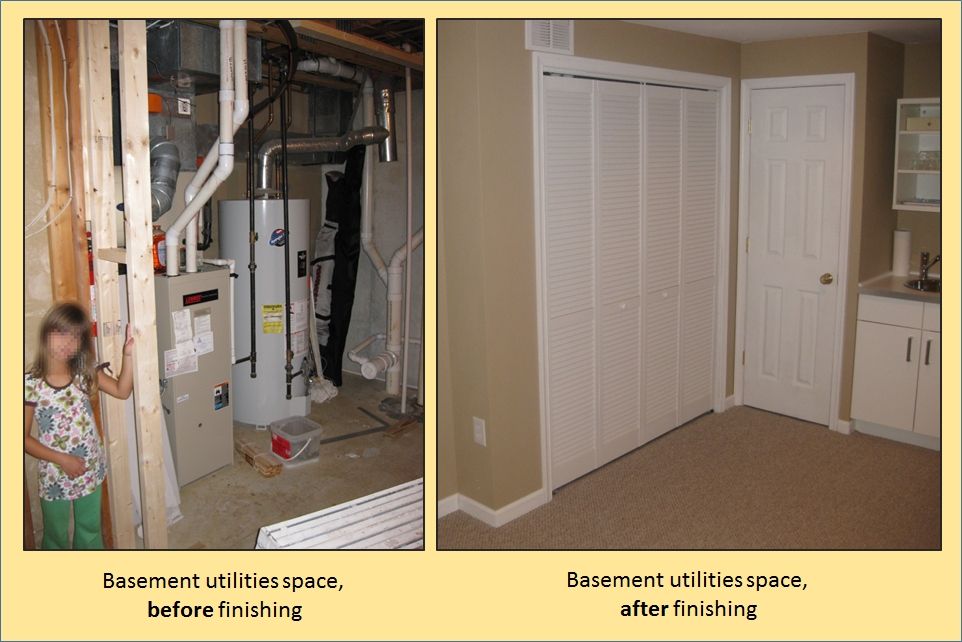
Do not forget combustion air if the basement houses a gas furnace or water heater. Finishing a basement changes the air dynamics around fuel-burning appliances: enclosing them in a small utility room can starve them of combustion air, causing backdrafting and carbon monoxide risk. Sealed-combustion (direct-vent) equipment sidesteps this, but atmospheric appliances need properly sized combustion air openings per code — a licensed contractor must verify this, and it is not negotiable. This single item is the most safety-critical line in the entire guide.
Dehumidification: The Non-Negotiable
If you take one thing from this guide, take this: a finished basement needs dedicated dehumidification, full stop. Air conditioning alone cannot do it — on mild humid days the cooling load is near zero while the moisture load is at full strength, so the AC never runs and humidity climbs unchecked. This is the exact scenario that produces the “cold and clammy” basement, and no thermostat setting fixes it because temperature was never the problem.
Whole-home (ducted) dehumidifiers tied into the basement’s ductwork are the premium answer: they hold the space at your target — 45–50 percent relative humidity is the sweet spot — independently of cooling calls, drain condensate automatically to a pump or drain, and run quietly out of sight. Sized to the space (a typical finished basement needs 70–100 pints per day of capacity), they simply erase the moisture problem. Standalone portable units work for smaller or phased projects but need manual emptying (or a gravity drain setup), are noisier, and struggle in larger open basements.
Drainage details matter: route condensate to a floor drain, laundry standpipe, or condensate pump — never just “we’ll empty the bucket,” because nobody does, and the overflow always happens during the August vacation. Put the dehumidifier on the same maintenance rhythm as the HVAC: clean the filter, verify the drain flows, and check that the humidistat reads true. A $30 standalone hygrometer on the basement wall is the cheapest verification instrument you will ever buy; glance at it the way you glance at a thermostat.
Code, Permits, and Safety: The Unskippable Part
Adding HVAC to a finished basement is permit work in virtually every jurisdiction: mechanical permits for the equipment and ductwork, electrical for the circuits, and often building permits for the finishing itself. Permits are not bureaucratic theater here — the inspection catches the combustion-air mistakes and undersized-duct shortcuts that cause real harm. Your contractor should pull the permits; if a contractor suggests skipping them, that tells you everything about the contractor.
Radon deserves a paragraph because basements are where it concentrates. Test before finishing — a $15–$30 charcoal test kit or a digital monitor — and if levels are elevated, install mitigation (typically a sub-slab suction system, $1,200–$2,500) before the drywall goes up. Mitigation after finishing is messier and pricier. This is not HVAC work, but it is basement work, and the finishing project is the moment to handle it.
Egress, while not HVAC, constrains HVAC: basement bedrooms need code-compliant emergency egress windows, and the duct layout must work around them. And carbon monoxide detectors are mandatory on every level with fuel-burning appliances — hardwired with battery backup where code requires. None of this is exciting; all of it is what separates a professional basement project from a future insurance claim. Hire licensed professionals for the mechanical, electrical, and plumbing work, and keep the permit cards until final sign-off.
Controls and Zoning: Making the Basement Behave
A basement on the same thermostat as the upstairs is a basement that is always wrong: when the upstairs calls for cooling, the basement — already cool — gets blasted; when the upstairs is satisfied, the basement’s dehumidifier and equipment sit idle while humidity climbs. Independent control is the fix, whether that means a full zone with its own thermostat and damper or a dedicated mini-split with its own remote.
If the basement shares the main system, a zone damper setup with a basement thermostat gives it a vote: the zone calls only when the basement actually needs conditioning, and the bypass or variable-speed equipment handles the reduced airflow gracefully. Pair it with a humidistat controlling the dehumidifier independently of temperature — humidity and temperature are separate problems below grade and deserve separate controls. Smart thermostats with remote sensors can approximate zoning on a budget, but a real zone with a real damper is the grown-up solution.
Program for the basement’s actual use, not the upstairs schedule. A guest suite occupied two weekends a month does not need full conditioning between visits — a setback with humidity control maintained is the efficient answer. A home office used daily needs the full treatment during work hours. The flexibility to match conditioning to occupancy is the quiet payoff of independent control, and it is where the energy savings that justify the equipment actually come from.
2026 Costs: Budgeting Basement HVAC
Realistic 2026 numbers: extending existing ductwork with supplies, return, and balancing for a typical finished basement runs $2,500–$6,000 depending on access and distance. A ductless mini-split serving the basement (one to two zones): $4,000–$9,000 installed. A ducted dehumidifier installed with drainage: $2,000–$4,500. Zone damper controls added to an existing system: $1,500–$3,500. A full dedicated ducted system for a large finished basement: $10,000–$18,000. Costs are 2026 US market ranges; get itemized local quotes.
Add the adjacent essentials to the budget honestly: radon testing and mitigation if needed ($1,200–$2,500), electrical circuits for the new equipment ($500–$1,500), and permit fees (a few hundred dollars in most jurisdictions). The all-in mechanical package for a typical 800–1,200-square-foot finished basement usually lands at $6,000–$15,000 depending on the approach — real money, but a fraction of the finishing cost it protects.
Get three quotes from licensed HVAC contractors, and make the Manual J load calculation a condition of the quote — any contractor who sizes a basement system by square footage alone has told you to keep looking. Ask each bidder the same questions: how will you handle dehumidification independent of cooling, where will condensate drain, how is combustion air addressed, and what permits will you pull. The contractor with the best answers, not the lowest price, is the one who will still answer the phone in August when the basement is perfect and you want to say thanks.
Frequently asked questions
Sometimes — but only a Manual J load calculation can say. Basements add far less sensible load than their square footage suggests, so spare capacity often exists; the question is whether the duct system can deliver the extra airflow without excessive static pressure. If the basement will be used very differently from upstairs (theater, gym, guest suite), dedicated equipment usually serves better regardless.
Most finished basements need some cooling capacity for summer, but their bigger need is dehumidification — which AC alone cannot provide on mild humid days when there is no cooling load. Plan for both: modest sensible cooling plus a dedicated dehumidifier on its own humidistat. Skipping the dehumidifier is the single most common cause of musty finished basements.
Target 45–50 percent relative humidity year-round. Above 60 percent, mold risk climbs sharply inside wall cavities and finishes deteriorate; much below 40 percent is unnecessarily dry and wastes energy. A $30 standalone hygrometer on the wall lets you verify the dehumidifier's humidistat is telling the truth.
In virtually every US jurisdiction, yes — mechanical permits for equipment and ductwork, electrical permits for new circuits, and usually building permits for the finishing. The inspection is genuinely valuable here: it catches combustion-air errors and duct shortcuts that cause real harm. Have your licensed contractor pull the permits, and be wary of any contractor who suggests skipping them.
Extending ducts ($2,500–$6,000) wins when the existing system has verified spare capacity and the basement's schedule matches the rest of the house. A ductless mini-split ($4,000–$9,000) wins for independent control — guest suites, theaters, gyms — and sidesteps capacity questions entirely. Either way, add dedicated dehumidification; neither option handles moisture alone on mild humid days.
Musty smell means moisture is winning: verify humidity is at 45–50 percent with a hygrometer, confirm the dehumidifier drains freely, and check that the space gets enough conditioned airflow. Persistent mustiness after that points to bulk water intrusion — grading, gutters, or foundation waterproofing — which is a building-envelope problem no HVAC equipment can fix. Address water entry first, then condition the air.